
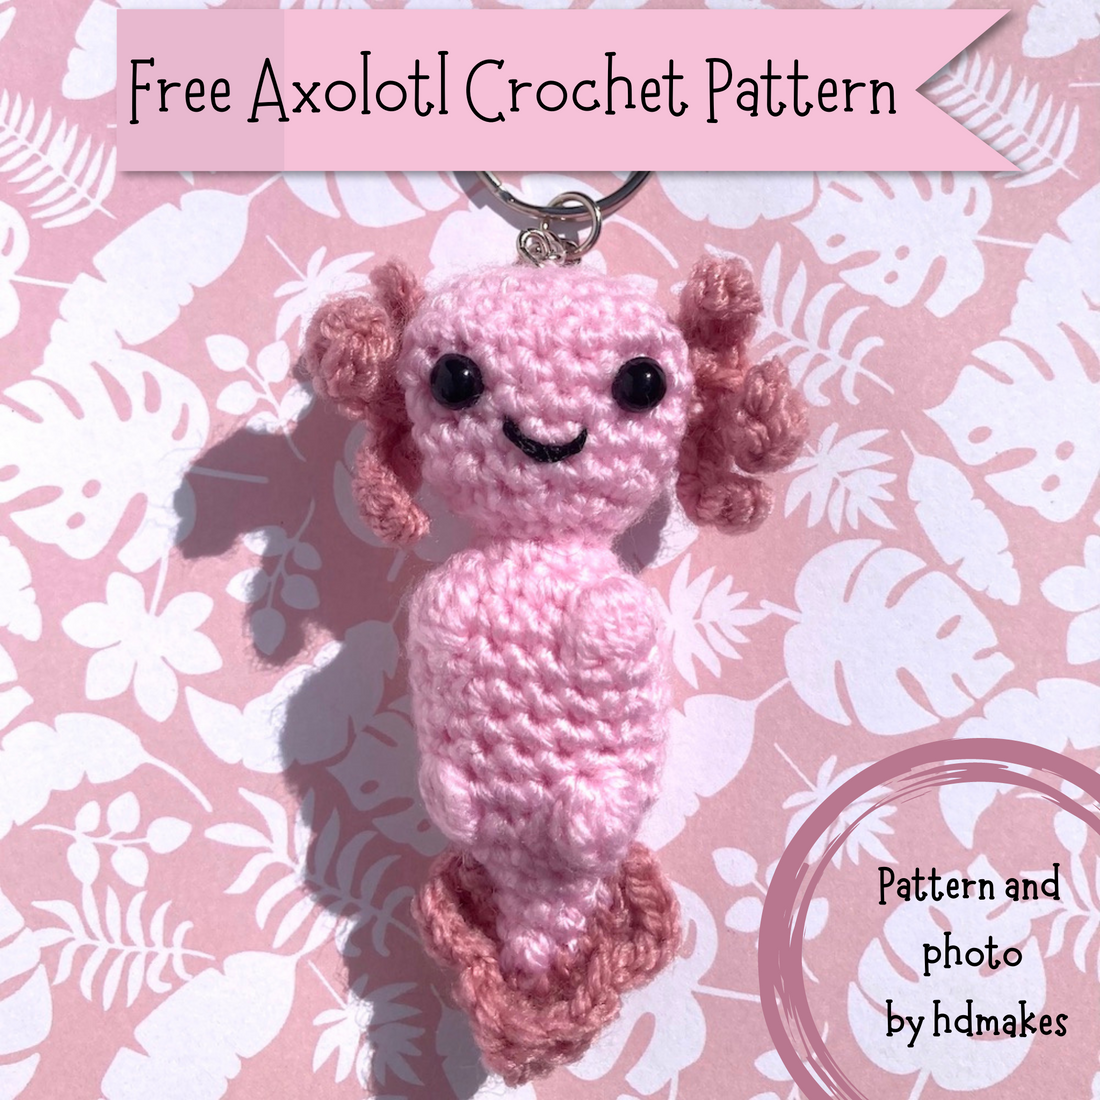
Free Axolotl Crochet Pattern - UK Terms
A little known fact about me is that as well as my crafting passions, I'm an avid gamer and have been since I was a child. One of my favourite places is the beach and I've always been fascinated by water-dwelling creatures. So naturally, I wanted to make a crochet axolotl.

I glanced through several axolotl patterns, mostly plush patterns, but I decided I wanted minimal sewing where possible. So I took the plunge and made my own and boy have these been a huge hit at my markets ever since.
I started with the traditional pink colour scheme for the axolotl but I couldn't resist the temptation back to blue yarn (it is my favourite colour after all). And I was not disappointed! Which colour axolotl is your favourite?

This pattern was originally designed with DK weight yarn in mind to create the keyring size, but I've been desperate to try micro-crochet for a while now and thought this pattern would be perfect. (I've always been one for a challenge). I didn't think it could possibly be any cuter - but somehow this micro-crochet axolotl is the cutest. I completely outdid myself with this one for a first attempt at micro -crochet and cannot wait to make more! These micro-axolotls in a bottle will be available to purchase as a finished object soon.
But onto the pattern. Before the pattern, here's the quick legal bit. Please do not reproduce this pattern or translate this pattern in any way. You are welcome to sell finished objects from this pattern - but if you do - please credit the pattern to HDMakes. :)
Materials required:
- One body colour DK weight yarn approx 15g
- One contrasting/darker colour DK weight yarn
- Suggested hook size 3mm for body 2.5 for add ons
- Polyfill stuffing
- 2 x 6mm safety eyes
- Black embroidery thread
- Yarn needle
- Stitch marker
- Scissors
Terms:
UK crochet terms are used in this pattern. If you are looking for the US version please click here.
|
ch |
Chain |
|
dc |
Double crochet |
|
Sl st |
Slip stitch |
|
Inc |
Work 2 double crochets into the same stitch |
|
Invdec |
Invisible decrease – insert hook into front loop only of the two stitches that will create the decrease. Yarn over and pull through both of these front loops. Yarn over and pull through both loops to complete your decrease dc stitch |
|
Bob |
Bobble stitch (instructions below) |
|
htr |
Half treble crochet |
|
Tr |
Treble crochet |
|
Dtr |
Double treble crochet |
|
Magic ring |
Magic ring |
|
(Inc, dc) x 2 |
Brackets indicate the pattern to be repeated, the multiple afterwards is how many times to repeat that pattern in total.
E.g. ( Inc, dc) x 2 means increase followed by dc in the next stitch total of 2 times. |
This pattern is worked in a continuous spiral so stitch markers will be essential. Stitch count is at the end of each round.
Main Body - made from the head down:
Round 1: With body colour, make a magic ring with 6 dc in the magic ring – 6st
Round 2: Inc in each st – 12st
Round 3: (Inc, dc) x 6 – 18st
Round 4: (dc in 2, inc) x 6 – 24st
Rounds 5-8: dc in each st – 24 st in each round
Round 9: (dc in 2, invdec) x 6 – 18st
Round 10: (invdec, dc) x 6 – 12st
After round 10 place eyes between rounds 6 and 7 approximately 6 stitches apart and sew small mouth in the middle of the eyes in round 8 using embroidery thread. I place the eyes on the opposite side of the head to the stitch marker/saver.
Lightly stuff the head
Round 11: invdec x 6 – 6 st
Round 12 : Inc in each st -12st
Round 13: (dc, inc) x 6 – 18st
To make our work more symmetrical dc around until you reach the middle of the back of the head (for me this was one stitch).
Round 14: (inc, dc in 2) x 2, bob, dc in 4, bob, (dc in 2, inc) x 2 – 22st
Round 15: dc in each st – 22st
Round 16: dc in 9, invdec, dc in 3, invdec, dc in 6 – 20st
Round 17: dc in 7, invdec, dc in 4, invdec, dc in 5 – 18st
Round 18: dc in each st – 18st
To make our work more symmetrical dc around until you reach the middle of the back of the head – for me this was one stitch.
Round 19: dc in 7, bob , dc in 3, bob , dc in 6 – 18st
Round 20: (dc, invdec) x 6 12st
Stuff the body fully.
Round 21: dc in 4, invdec, dc in 4, invdec – 10st
Round 22: dc in 3, invdec, dc in 3, invdec – 8st
Round 23: dc in 2, invdec, dc in 2, invdec – 6st
Round 24: dc in 1, invdec, dc in 1, invdec – 4st
Fasten off the bottom leaving a tail. Using a yarn needle, take the yarn tail through the body a few times, if you are turning this into a keyring, make sure you leave the yarn tail at the top of the head to attach the keychain.

Ear side pieces
Using 2.5mm hook, ch 7,
In 2nd chain from the hook, sl st, dc in 4, ch 6, sl st in 2nd chain from the hook, dc in 4, dc in side of last dc from previous chain strand, sl st into the chain from the original chain. Ch 5, sl st in 2nd chain from the hook, dc in 3, dc into side of the last dc from the previous ch and back into the last ch from the original ch. Fasten off leaving a tail.
Make two of these.
Attach to each side of the head roughly in line with the eyes by sewing both tails through to the opposite side of the head. Pull this tight but not so tight that it warps the head. Sew back through making sure that you catch a stitch from the ear piece each time to secure in place.
If you are unsure how to make the ear pieces and attach them - you can watch my brief video on TikTok here.
Tail piece
Using 2.75mm hook, ch 10
Dc in 2nd ch, htr, tr,htr all in the next ch, sl st in next ch, htr in next ch, tr,dtr,tr in next ch, htr in next ch, sl st in next ch, htr, tr, htr in next ch, dc in last ch
Sew both yarn tails through the tail from the side near the base of the bobble foot. Using the yarn tail, sew the tail piece to the tail down the side and then secure through the body.
If you are unsure how to attach the tail piece you can watch a quick video on TikTok here.

And that's it! You now have your own little axolotl. I'd love to see your finished creations. Please tag me on social media :)
Heidi x